Part of the whole hands-on experience when it comes to feeding your family is finding fresh and delicious ingredients. For the past few weeks I have discovered what a wonderful thing a local farmer's market can be. Although the prices were not much better than the local supermarket, which was contrary to my initial belief, you actually get more bang for your buck because of how flavorful and fresh the produce is. For example, about a month ago I purchase a gigantic plastic clamshell of bright red strawberries for about $4.00. They looked absolutely delicious, but that's about where it stopped. These strawberries were an ugly girl with bright red lipstick; almost completely white on the inside and totally sour. Conversely, today at the farmers market I was able to pick up a quart of equally pretty strawberries for $6.00. Fewer strawberries, more money, you might think I'm an idiot. As it turns out these berries were picked just last evening, and are so sweet and juicy you wouldn't even think they were the same fruit as what I grabbed at the supermarket. What would you rather buy? A big cheap container of sour berries, or a smaller, fresh, and candy sweet ones?
As I have mentioned in earlier posts, I like to get inspiration from fresh foods I run across. What better thing is there than the fresh local produce of a farmer's market from which to be mused? Plus you get the added benefit of knowing that you are helping to sustain your neighborhood local small businesses. It's a win-win-win as far as I can tell.
Happy cooking!
An engaged approach to cooking
Saturday, June 9, 2012
Wednesday, June 6, 2012
A Tale of Two Pies
It was the best of
pies, it was the worst of… wait?
Who’s ever heard of bad pie, let alone worst pie. There can
certainly be pie that is not as good as another, but never worst pie. Worst is too harsh a word to describe
such a wonderful thing. If you know me
personally you probably know how much I love pie, and over the past couple of
months have been working on perfecting my pie skills.
Practicing you ask?
Over the years pie has earned itself quite a reputation, and however
easy the guy on TV makes it look, it isn’t.
It was at a work luncheon a few months ago that I realized many people
don’t know the joy which is a homemade pie.
After the lunch dishes had been taken away we were each given a randomly
selected slice of pie on a Styrofoam plate when several people pushed it
away. Some even exclaimed, “ew, I don’t
like pie.” It could be easy to
understand why someone might not like pie if all they ever had was what comes
from the local supermarket; flat and bland crust, gummy processed fruit
filling, sandy crumble topping. With an
unending variety of forms and fillings I think it misjudging to make such a
broad statement. That person just needs
to find their pie.
And with that I present you with today’s (rather long)
entry; a duo of pies that couldn’t be more different, a tart and refreshing Key
Lime with graham cracker crust, followed by another southern classic with a
reputation as tough as the shell of its ingredients, a hard nut to crack it you
will, Pecan! (I will try and hold off on the nut puns, but no promises.)
Key Lime pie is actually incredibly easy to make, and can be
thrown together surprisingly quick.
Here’s what you’ll need:
KEY LIME PIE

1 9 Inch pie plate
Crust:
Crust:
4 tablespoons (or a half-stick) unsalted butter -
melted
¼ cup white sugar
1 brick graham crackers
Dash of salt
Filling:
1 can sweetened condensed milk
1 lb fresh key limes – zest removed and juiced
(roughly ½ cup juice)
2 egg yolks
1. After
pre-heating your over to 350 degrees, we will prepare the wonderfully crumbly
graham cracker crust; a classic when it comes to Key Lime pie. In your food processor, destroy your brick of
graham crackers. That’s right,
absolutely pulverize them. Then add the
sugar and dash of salt and pulse a few times to incorporate.


Absolutely pulverized
2. Toss the
crumbs into your pie plate and pour the melted butter over top. Stir together until fully incorporated, and
then press into the shape of the pie pan.
The wall needs to be around an inch in a half tall to hold all the
filling. Mine was too high, so after
filling I pressed it down for a better presentation.

You can add more butter if it isn't coming together. Make adjustments! Recipes aren't chiseled in stone.

3. Toss the
crust in the oven for 7-8 minutes to brown and set.
4. Now for
the fun part, prepping the limes. The
first thing you will notice is that key limes are really small, and for somebody
with big hands like myself are a pain in the butt to work with. They are also delicious and worth every ounce
of trouble they bring. If you don’t live
in Florida and can’t get them locally you’ll also notice that they probably
have some brown spots on them. This is
fine. Wikipedia tells us that Key Limes
have thin skin and are highly perishable, so it is easy to understand why the ones
you just bought have some slight discoloration, which certainly doesn’t affect
the flavor. I begin by zesting the limes
using a Microplane; drawing them across the Microplane and avoiding the brown
spots, and also not going deep enough to remove the bitter and white pith. Cut the limes in half, and using a citrus
reamer harvest their souls… er… juice.

If they could speak they would be begging for mercy!

Make sure you keep the Microplane stationary and pull the lime across the grating surface

We're naked!

Whew. That was a lot of work.
5. Separate
your eggs. I save the whites in the
freezer for my wife, no use throwing away half of what you paid for. Combine egg yolks, sweetened condensed milk,
lime juice and zest and whisk briskly.


6. Pour
filling into baked crust and bake for 15 minutes, just long enough to get those
eggs cooked and harness their thickening power.
7. Serve with sweetened whipped cream (2 teaspoons
confectioners’ sugar, ½ tsp vanilla extract, 1 cup heavy cream beaten until
stiff.)

Yum!
This pie is the perfect way to wake up your taste
buds for the fresh flavors coming this summer.
The key limes bring a wonderfully bright flavor that isn’t quite as
harsh as your generic lime, and the sweetened graham cracker crust plays off
the sour filling. The taste of the
tropics right here in Ohio. Remember
what I said about traveling somewhere on the cheap? Close your eyes while eating this pie and you
almost feel like you’re sitting on the beach.
For pie number two we’re going to tackle a
permutation that requires a larger skill set, and certainly more practice. But before we can make the filling, we have
to understand the crust. The following
recipe is for two 9-inch pie pans.
Consequently I usually make 10-inch pies, which are a bit larger than
standard, so I always make this recipe and reserve about 1/3 of the uncooked
dough for later (read: giving to my dad and wife to eat raw). What can I say, bigger is better! The following is an incredibly standard
recipe for pie dough.
PIE DOUGH
2 1/2 cups all-purpose flour
2 ½ teaspoons salt
3/4 cup really cold lard (I’m not condoning the
use of shortening)
3 Tablespoons really cold unsalted butter, sliced
into small cubes
Ice water (about ¼ cup)
1. Begin by combing the flour, salt and butter
cubes in a food processor. Pulse a few
times (3-5) until butter is incorporated.
2. Next add lard and pulse again until mixture has
a mealy texture (3-5 times).
3. Turn on food processor and add the water slowly
(but not too slowly!) until the dough comes together.
4. Pull off your excess 1/3rd, and pass
to wife for a snack. Lightly flower the
remaining portion’s exterior, form into a disk, wrap in plastic wrap, and place
in the fridge for 30-45 minutes to rest.

5. Remove dough from fridge and using a rolling
pin roll out until the edge goes a few inches beyond the size of your pie
plate. Make sure your hands, work
surface, and rolling pin are lightly floured to avoid sticking and tearing!
(VERY IMPORTANT!) Overworking your dough
will make it gummy, and be sure to keep it as cold as possible, this will
maintain flakiness!
6. Once dough is the proper size, gently roll up
on your rolling pin, and unroll into pie plate.
The best analogy I can think of is those old rolling window shades you
used to snap up in school to annoy your teacher.


7. Cut edges to fit, and crimp as desired (I’m
still not that good at this, but you can bet your britches when I master it I
will put something here!)

As you can see, I still need more practice. Still tastes great!
8. Follow recipe to complete pie. For this recipe the crust will need to be
pre-baked in order to ensure a dry and flaky crust. Without this step the liquid filling will
make the crust soggy. Yuk.
To Blind-bake your pie crust:
1. Pre-heat oven to 425 degrees. Poke some holes into bottom of crust with a
fork to vent.
2. Butter one side of a piece of aluminum foil
that is large enough to cover entire crust.
Place inside with butter-side down, and then fill with some sort of
bake-able weight. I have a bag full of
dried pinto beans that I’ve been using for years. Cheap and easy.


No, this is not pinto bean pie....
3. Bake for
15 minutes with beans in place, and then remove beans by simply removing the
aluminum foil. The foil will cool down
almost instantly, so quickly tear it into strips and cover the crimped edges of
the crust. This will prevent them from
browning too much. Return to oven for
another 5 minutes.

4. Let cool completely before filling pie.
And now for the deliciously sweet pecan filling
(which can quickly be whipped together while your dough is resting in the
fridge. See step 4 above):
PECAN PIE FILLING

5 eggs
1 ¼ cups brown sugar (Use light or dark depending
on your preference, I liked a combination of both)
1 Cup Golden Syrup (More on this later)
6 Tablespoons butter, melted
1 ½ teaspoons vanilla extract
½ teaspoon salt
2 ½ cups toasted and spiced pecans (recipe to
follow)
1. While
your oven is pre-heating to 375 degrees, whisk together the eggs, brown sugar,
golden syrup, butter, vanilla extract and salt until homogenous.
2. Spread
pecans evenly inside prepared crust, and slowly pour syrupy mixture over
top. Believe it or not, the pecans will
float on top of the mixture, creating that lovely layered effect that is a
trademark of classic pecan pie. Who
knew?

3. Bake for
35-40 minutes or until the outside is set and the center is still slightly
wobbly. Be careful! While your pie may not look at all done after
30 minutes, an additional 5 minutes goes a long way. This pie can go from perfect to overcooked
quickly.

See! They do float! Nobody ever told me that secret.
4. Let rest
for 2 hours or so until cooled and set.

For the toasted and spiced pecans, I simply tossed
the pecans into my cast iron skillet with a teaspoon of white sugar, a ¼
teaspoon each of cinnamon and cumin, and a tiny dash of salt. Toss over medium-high heat until the nuts
have developed their flavor and begin to smell toasted, around 5 minutes. This adds additional depth of flavor to the
nuts and really awakens their… nuttiness.
There’s no better word.

Pecan pie wasn’t something I discovered until
recently, but have since become a huge fan.
The amazingly sweet filling plays the perfect foil to the earthy and
toasted nuts, both in flavor and texture.
Put that inside a rich and flaky crust and I’m in heaven, a destination
you won’t reach with the pie from your grocery store.
And for the golden syrup mentioned above? This ingredient is much more popular in Great
Britain where it is sold as a by-product of the sugar refining process; much
like molasses is sold here. In
comparison to the traditional clear corn syrup many people prefer to use in
their pecan pie, the golden syrup brings a much greater depth of flavor to the
party. It can often be found in the
international section of your local supermarket, unless you live in Cincinnati,
in which case you should go to Jungle Jim’s. :-D

Stickiest.Stuff.Ever. But oh so delicious.
So that about wraps it up for this (long) entry. Let me know what you think! I realize this entry took forever to prepare and get made up. Life happens, but believe it or not I already have several more entries prepped, and should shortly be on the way, pending any currently unforeseen disasters (you never know whats right around the corner.) And as always, don’t forget to like me on
Facebook at www.facebook.com/handsoncuisine,
and follow me on twitter @HandsOnCuisine. Happy eating!
Monday, May 14, 2012
Traveling for Cheap
One thing that I love is traveling. There's nothing quite like slipping away from the dull routine of life and experiencing something new and exciting. Unfortunately, traveling also costs money. Sometimes lots of money; so much that you can't visit someplace you really love for many years at a time. One thing people often fail to realize is that it's easy to travel on the cheap right from your own kitchen. Many times the memories we build while traveling revolve around the food we enjoy at that far off destination, and it can be an insatiable craving when you're reminiscing about a wonderful trip you once had. That luxurious pasta you had in Europe, the rich curry you tried at that Indian restaurant in Japan, or simply the chicken paprikash you had at the local Hungarian restaurant; all of these can be created right in your own home, and after a little experimenting you can get surprisingly close to developing those exact flavors.
I often draw inspiration from dishes I've had elsewhere that I can't get at home. It's a fun way to strengthen your chops in the kitchen and test your palate and memory. So what are some tips for imitating a recipe when you're starting from scratch? First I like to make a list of ingredients that I know are essential and positively part of the recipe, which can sometimes be astonishingly simple. The same goes for processes, such as making fresh pasta or rolling meatballs. If I'm really stumped at nailing down some elusive flavor I will sometimes scour the internet or cookbooks for help. Make sure you are prepared so that the process runs smoothly. After reviewing the ingredients and processes I will develop a mental plan of execution, and set up my mise en place. Finally, it's critically important when developing any recipe to TASTE your food throughout the cooking process. You're working on developing a distinct flavor from your memory and from scratch. Making adjustments is naturally part of the process. The real work comes once you sit down to enjoy your creation. If successful, you will be surprised at how wonderful the achievement feels as you are transported to your favorite getaway. If it didn't come out just right, enjoy what you've made and learn from it. Perhaps you missed an ingredient, overcooked a component, or maybe you just need a little more practice rolling out pasta dough. Don't become discouraged, you can always try again. (Remember what I said about family members as guinea pigs???) Either way you can be proud of your final product while enjoying how short and cheap the trip back to that tiny Italian restaurant on a sunny afternoon in Germany really was. All for the price of dinner afterall...
I often draw inspiration from dishes I've had elsewhere that I can't get at home. It's a fun way to strengthen your chops in the kitchen and test your palate and memory. So what are some tips for imitating a recipe when you're starting from scratch? First I like to make a list of ingredients that I know are essential and positively part of the recipe, which can sometimes be astonishingly simple. The same goes for processes, such as making fresh pasta or rolling meatballs. If I'm really stumped at nailing down some elusive flavor I will sometimes scour the internet or cookbooks for help. Make sure you are prepared so that the process runs smoothly. After reviewing the ingredients and processes I will develop a mental plan of execution, and set up my mise en place. Finally, it's critically important when developing any recipe to TASTE your food throughout the cooking process. You're working on developing a distinct flavor from your memory and from scratch. Making adjustments is naturally part of the process. The real work comes once you sit down to enjoy your creation. If successful, you will be surprised at how wonderful the achievement feels as you are transported to your favorite getaway. If it didn't come out just right, enjoy what you've made and learn from it. Perhaps you missed an ingredient, overcooked a component, or maybe you just need a little more practice rolling out pasta dough. Don't become discouraged, you can always try again. (Remember what I said about family members as guinea pigs???) Either way you can be proud of your final product while enjoying how short and cheap the trip back to that tiny Italian restaurant on a sunny afternoon in Germany really was. All for the price of dinner afterall...
Thursday, May 10, 2012
Find Something That Inspires You!
Sometimes I find it fun to go to the grocery store and walk
through the produce section until I find something that inspires me. A few months ago my interest was piqued by
something that looked rather interesting; a minneola.
A minneola, as I later found out, is the cross between a tangerine and grapefruit, and produces a wonderful juice that doesn’t quite have the bite of orange juice but still maintains that wonderful citrusy flavor. Somehow the idea came to mind that I would try and make a fresher and not so deep-fried version of that *citrus of choice* chicken you get at your favorite fast-food Chinese restaurant. Paired together with some sautéed green beans and homemade fried rice (using the other night’s leftovers) it would hopefully turn out to be deliciously simple, and much fresher than that stuff you get at the mall. Since then I have refined the recipe a bit to make it work using only one pan (two if you choose to do fried rice) while making a fresh homemade version of one of everybody’s favorites.

Inspiring?
A minneola, as I later found out, is the cross between a tangerine and grapefruit, and produces a wonderful juice that doesn’t quite have the bite of orange juice but still maintains that wonderful citrusy flavor. Somehow the idea came to mind that I would try and make a fresher and not so deep-fried version of that *citrus of choice* chicken you get at your favorite fast-food Chinese restaurant. Paired together with some sautéed green beans and homemade fried rice (using the other night’s leftovers) it would hopefully turn out to be deliciously simple, and much fresher than that stuff you get at the mall. Since then I have refined the recipe a bit to make it work using only one pan (two if you choose to do fried rice) while making a fresh homemade version of one of everybody’s favorites.
MINNEOLA GLAZED CHICKEN LEG QUARTERS WITH SAUTEED GREEN
BEANS & FRIED RICE
Our hardware today is quite simple.
1. Medium frying pan which is oven safe (cast iron!)
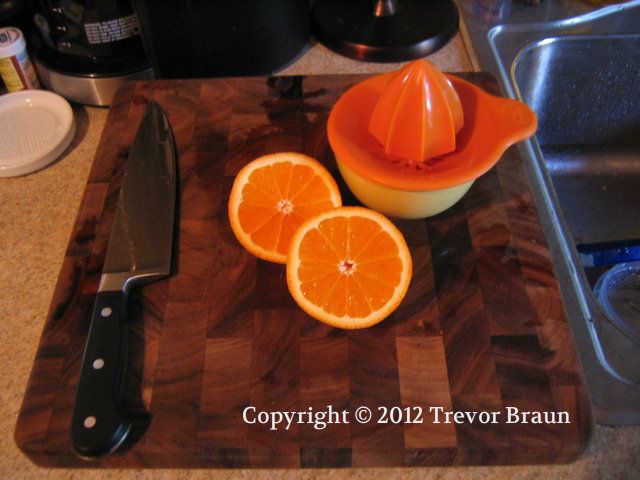
2. Citrus Reamer to juice our fruit
3. Ginger grater (microplane will work well too)
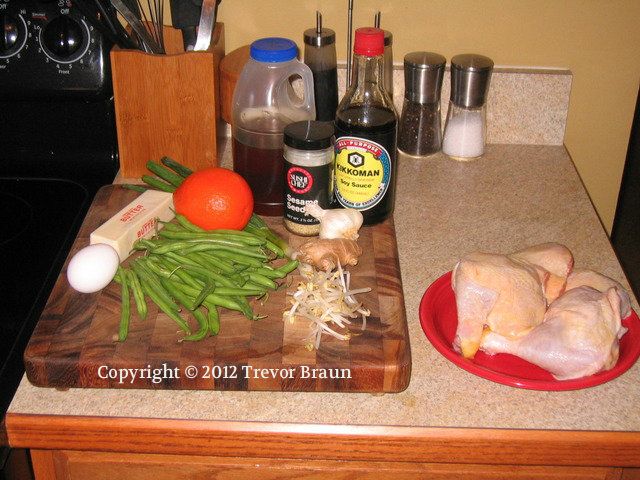
And the lineup:
CHICKEN
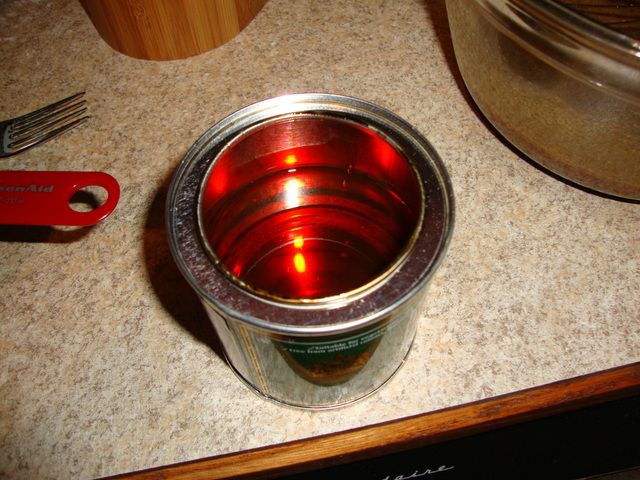
Juice of 1 Minneola
1 Cup Chicken Stock (preferably homemade)
2 Tablespoons Sesame Seeds
2 Tablespoons Honey
1 Inch knob of ginger, peeled and grated
2 Tablespoons Soy Sauce, additional to taste
2 Tablespoons butter
4 Chicken Leg Quarters
1 Clove Garlic, finely minced
BEANS
1 lb. or so of fresh green beans, stems removed
1 Tablespoon peanut oil
Zest of 1 Minneola
1 Tablespoon soy sauce
Slivered almonds to garnish

So before we get to the down and dirty, I feel I
owe you a few explanations into where my train of thought was going when I was
coming up with this. First of all, why
chicken leg quarters? If you’ve ever
eaten that glazed chicken at your local establishment you’ll quickly realize
there is no white meat to be found.
While they probably do this to save money (which is certainly a great
reason to do something) I also prefer the moist and meaty texture you get from
the dark thigh and leg meat. Secondly,
why specify homemade chicken stock? As I
will undoubtedly cover sometime in the future, I like to save money by buying
whole chickens and breaking them down myself.
After that process is completed you’ve got a wonderful pile of leftovers
that would be a shame to waste. Why
spend $4-5 for a quart of chicken stock at the store when I can make a gallon
with these leftovers, some water, and some veggies. Way cheaper, much tastier, and you know
exactly what’s going into your food. I
digress, homemade chicken stock is cheaper, has a more developed flavor, and
can be packaged into any size container you want for convenient future
use. What else could you ask for?
1. Preheat your oven to 425 degrees. Toss the chicken leg quarters into the cast
iron skillet, skin facing up, and sprinkle lightly with kosher salt. Bake for 30-45 minutes or until internal
temperature reaches 165 degrees. Remove
from oven, and remove chicken to rest on side plate. Remove liquid and grease that has rendered
from chicken.
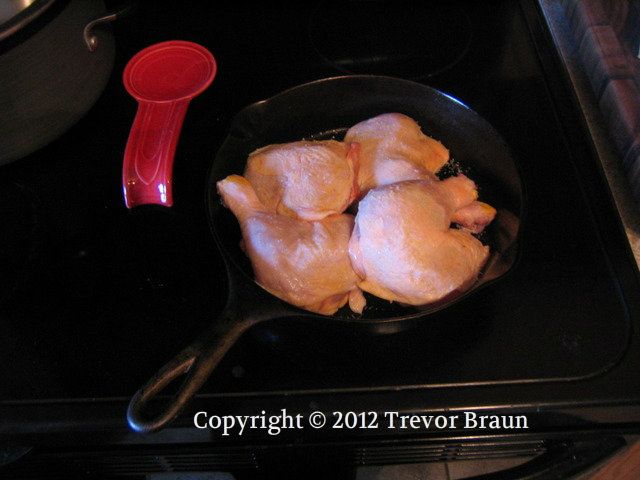

Packed House
 2. Now to the stove top. Heat 1 tablespoon peanut oil and 1 tablespoon
soy sauce on medium high; sauté green beans until fork tender, about 5-8
minutes. I like them to maintain a
little bit of the fresh crispness for texture.
2. Now to the stove top. Heat 1 tablespoon peanut oil and 1 tablespoon
soy sauce on medium high; sauté green beans until fork tender, about 5-8
minutes. I like them to maintain a
little bit of the fresh crispness for texture.
3. At the
last moment, toss green beans with almonds and minneola zest. Remove to serving plate.
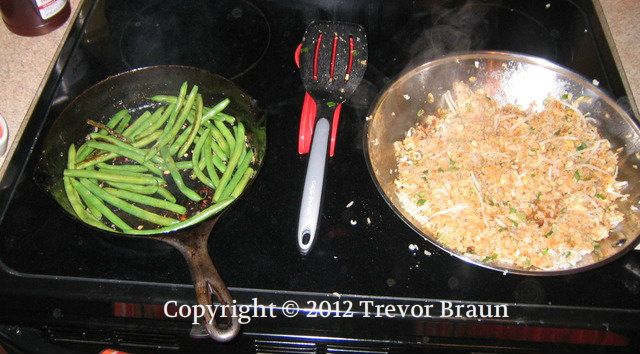

Multitasking!
4. Melt
butter in same frying pan over medium high heat, and return chicken quarters to
pan, skin side down, until skin is golden brown and crispy. Remove to clean plate.
5. Quickly sauté
minced garlic in remaining butter for 1 to 2 minutes, then add chicken stock,
honey, ginger, soy sauce, and sesame seeds to pan over high heat. Reduce until thick and caramelized. Return chicken to pan quickly and toss until
thoroughly coated to glaze.
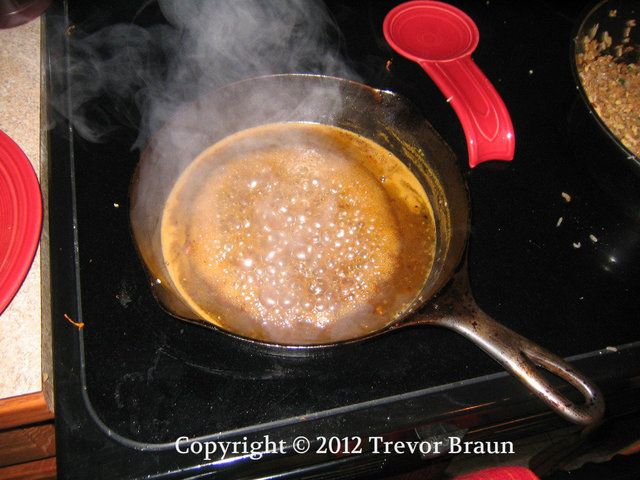

Don't forget to stir!
Finally, to round out the meal, I made a simple
fried rice using a 50/50 mix of brown and white rice I had left over from a
dinner earlier in the week. Using
leftover rice or simply cooled down rice is a necessity when making fried rice,
because for some reason once the grains cool down they separate much easier and
get that lovely texture that is fried rice.
I wish I could supply you with quantities on this one… but this one
really works best catered to your personal taste. That’s one of the fun things about fried rice,
you can take it in several directions, and make it with your personal favorites. Here’s my simple ingredient list:
1 tbsp peanut oil
2 whole fresh scallions, thinly sliced
Leftover rice
1 egg
Fresh bean sprouts
Soy sauce
1. Start
off by getting your oil nice and hot in a large frying pan, or wok if you have
one. Just before it starts smoking add
the rice and fry for 1-2 minutes.
2. Make a
well in the middle of the rice and place the contents of one egg inside,
scramble with a fork and cook through.
Then mix together with the rest of the rice.


Well... a deep subject
3. Add vegetables
and then soy sauce to taste, as least a couple tablespoons. It really depends on how much rice you are
using. Fry until heated through and
vegetables have slightly softened.
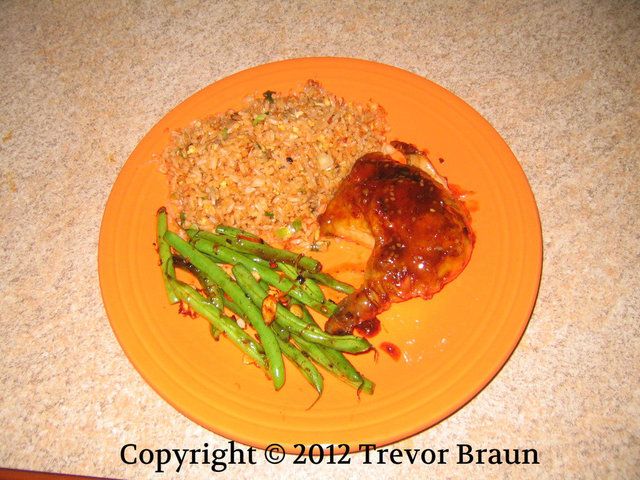

Now doesn’t that look delicious? Granted, it may not be as quick as stopping
by your local establishment, but this dish is simple and tasty. By baking the chicken first we make sure it reaches
a safe temperature, and then get that extra crispy skin everybody loves by
browning it quickly in the butter. Once
the glaze begins to reduce down the sugar in the honey and minneola caramelizes
and creates a wonderfully rich and flavorful compliment to the crispy skinned
chicken. By including the zest of the
citrus with the green beans a common thread is pulled throughout the
plate. Together with the fried rice you
now have a dinner that rivals any fast-food you could find, and will certainly
have your loved ones or guests asking for more!
The hope here at Hands On Cuisine is to have big updates at least weekly. Follow me on twitter @HandsOnCuisine, and give it a like on Facebook, facebook.com/HandsOnCuisine
Look for more updates soon!
The hope here at Hands On Cuisine is to have big updates at least weekly. Follow me on twitter @HandsOnCuisine, and give it a like on Facebook, facebook.com/HandsOnCuisine
Look for more updates soon!
Thursday, April 26, 2012
A BIG Thank You!
Well, if you're one of the 40 SPAMbots that have floated past here since this little place was started up, you'll certainly notice our spiffy new logo! Yes indeed, a real logo, and an awesome one at that! As thanks I want to throw a shout out to Irene Gust and Blake Martin for the design and creativity, which I greatly lack. Consequently, they also designed our wedding invites and did a smash up job, and run a business designing them on etsy. If you like what you see, or want to see more, take a quick click and check them out here!! You won't be disappointed.
Tuesday, April 24, 2012
Fish Fry Recipes
As promised, here are the condensed recipes for the previous post:
FRENCH FRIES
Ingredients:
Potatoes (However many you think you can eat!)
Oil (Peanut, Corn, Canola, Lard) Enough to cover fries (1-2 inches deep)
Course Salt
1. The night before, scrub, peel, and slice your potatoes into french fries. Place in medium bowl filled with water overnight.
2. Strain out potatoes, and thoroughly dry with paper towels.
3.
Using a heavy-bottomed skillet and frying thermometer slowly bring
the temperature of the oil up to 325 degrees Fahrenheit.
4. In small batches, place fries into heated oil, being careful to maintain proper temperature. Fry potatoes for roughly 5-8 minutes until light brown in color. Gently shake off excess oil and set aside to cool for 45 minutes to one hour.
5. After potatoes have rested, bring temperature of oil up to 375 degrees. Again in small batches, fry the potatoes for a second time until golden brown and crispy. Gently shake off excess oil, and place in a mixing bowl with a few large pinches of salt. Toss and serve immediately.
BEER BATTERED COD
2-3 pounds fresh Atlantic cod
1 12 oz. bottle of your favorite beer
2.5 Cups All-Purpose flour
Generous sprinkle of Garlic powder
Salt & Pepper to taste
1.
Thoroughly rinse and dry each filet, then cut into smaller diamond shaped pieces.
2. Begin heating cooking oil while setting up the frying station. Place 1 cup of flour and put it in a bowl.
In another medium mixing bowl, pour in the bottle of beer, and sift the
remaining flour (1.5 cups) and garlic powder into the beer while whisking until
evenly combined while being careful to not over-mix. Taste batter and season with salt
and pepper to taste
3.
Once oil has reached 375 degrees you can begin frying. First drop each piece of fish into the
batter, then dredge through the flour to coat, then gently place into hot oil. Work in small batches depending on the size of your frying pan.
4. Fry for 2-3 minutes on each side until golden brown and delicious, while gently moving around to keep from sticking together.
5. Remove
to a cooling rack for about a minute to relax and release any extra oil. Serve with a lemon wedge and tartar sauce.
AND COMING SOON: A deliciously crispy Minneola & Ginger Glazed Chicken. You won't want to miss this one!
Subscribe to:
Posts (Atom)