With Good Friday having recently come around, I wanted to
host a good ol’ fashioned homemade fish fry.
As is customary around here I often utilize my guests (read: family
members) as guinea pigs. What good is
trying something new if you can’t get some honest feedback on it? And if anybody will be honest with you, it
will be your family. So today we will
take a look at a delicious fish dish anyone can pull off with the right
equipment and a bit of knowledge, all the while knowing exactly what is going
into your food and having a great time preparing it.
In order to successfully pull off some fresh fish n’ chips
there is some essential hardware you will need:
1.
Heavy Bottom cast iron skillet – Deep fryers? We don’t need no stinkin’ deep fryers. But really, why waste your money and precious
storage space on a uni-tasking electric deep fryer when you can own wonderful
multi-tasking cast-iron. But this isn’t
hardware review.
2.
Frying Thermometer – The key to crispy fried food. Having your oil at the proper temperature is
what gives you that wonderful crunch we are all seeking. Oily, soggy food is nasty, and best friend to
incorrect temperatures.

3.
Wire Spider – Simply the best way to remove your hot food from the oil
and shake off any excess.
4.
2 Medium Mixing Bowls – to make our battering station.
5.
A wire cooling rack, with newspaper underneath – This will give our fish
a few moments to cool down and for the excess oil to drip off. This is really important, because if you
remove directly to a plate you will end up with a soggy mess.
And here’s our software:
Batter:
1. One bottle of your favorite beer. I used a locally produced favorite.
2. 2.5 Cups All-Purpose flour
3. Generous sprinkle of Garlic powder
4. Salt & Pepper to taste

Fish:
This volume of batter was good for about 2.5 lbs of fish. We picked just basic cod from the grocery
store.
Potatoes: We fried up
nearly a 10 pound bag of Idaho potatoes which were scrubbed, peeled, cut into
fries, and soaked in cold water overnight to pull out some of the starch.

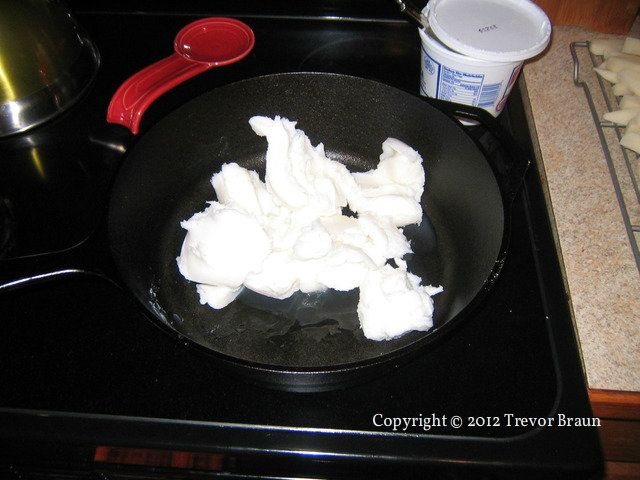
The frying fat: Lard. More on this later
The key to pulling off this traditional fish-n-chips is time
management and an organized mise en place, a.k.a. your set-up. Since fried food is the best as soon as it
comes out of the oil, you want to be able to serve it up as you pull it
out. By making sure everything is set up
and ready to go before you start you can deliver fresh, hot, and delicious
fried food, therefore I will cover this in a series of simple easy to follow
steps. But first, a word about fat…
When frying foods you have as many choices for frying medium
as flavors of yogurt in the dairy case (wow there are a lot.) Anything with a high smoke point will do
fine; in the past I have fried with corn, canola, and peanut oils, all of which
stand up to the temperatures just fine.
For this fish fry, I wanted to try something different, something that
would be delicious, natural, and was at one time considered the king of
frying. Yeah, you guessed it, 100% pure,
unadulterated and deeelicious pork lard.
Yes, it was awkward at the checkout register. Yes, I felt fatter than I already am. Yes, it was delicious. But, the smell was heavenly, with my
father-in-law asking what smelled so amazing upon just walking in the door. And I had only begun to melt down the lard. But to the health point, research has shown
lard to be much healthier than people expected, and it’s all natural, which scores
mega points in my book. Check out this
awesome Food & Wine article by Pete Wells, it’s worth the read.
A Preface about French Fries!
Many people around the interweb will try and tell you that
you only need to fry your french fries once and once only. My opinion about those people? They are lazy twits. Double frying your french fries is an
essential step, especially when preparing a fried dinner such as this for many
reasons. First, let me explain the
process, then give you reason behind it.
FRENCH FRIES
1.
Using your heavy-bottomed skillet and frying thermometer slowly bring
the temperature of the oil (lard!) up to a balmy 325 degrees Fahrenheit. You’ll
need enough oil to completely cover the fries, so roughly at least 1.5 -2
inches deep.

2.
While your oil is heating drain your sliced potatoes, which have been
soaking overnight in the refrigerator, and thoroughly dry them with a paper towel. As we all learned in second grade, oil and
water definitely do not mix. Especially
hot oil.
3.
Once your oil has reached proper temperature, and using your spider, in
small batches, slowly lower the raw potatoes into the oil, which will start
violently bubbling and will then calm down once the residual water is
gone. Water does not die quietly.
CRITICAL TIP!
These are fried in small batches because as
soon as the potatoes hit the oil, you will notice a drastic drop in the
temperature of the oil. Try your hardest
to maintain the proper temperature throughout the frying process. You will have more control on a gas stove
than electric, so it pays to be well acquainted with your heating implement so
you can effectively maintain control.
Make sure you let your oil get back up to the proper temperature in-between
batches.
4. Fry the potatoes for about 5-8 minutes, until
they are just starting to turn a light brown color. Then remove them from the oil, let some of
the residual fat drip back into the pan, and set aside to cool.
5.
Repeat process until all potatoes have been cooked.
6.
After fries have been given ample time to calm down (about 45 minutes to
an hour) you can crank up the heat to 375 degrees. Your now precooked potatoes will be soft and
soggy, just like we want them to be.

7.
Again working in small batches, fry potatoes for another 2-3 minutes,
working to maintain oil temperature, until the fries are golden brown and
yummy. I mean crispy. Remove from the
oil and drop them into a metal mixing bowl with some coarse salt in the
bottom. Toss to cover and serve!
So why did we go through the trouble of double frying our
french fries? Frying the potatoes the
first time at lower temperature cooks the potatoes through without giving them
the crispy exterior that makes fries so amazing. By then letting them cool down and re-frying
at higher temperature we:
1.
Give a fresh crispy exterior and fluffy, potatoey interior. (Is that a
word?)
2.
Decrease final cooking time. If
we were to fry them all one time, each batch would take 7-9 minutes to
complete, making nearly impossible to get all the components of your fried dish
done at the same time. Time from kitchen
to table really counts here!
3.
Warding off the hordes of hungry guests while frying fresh french fries
practically requires a broad sword. Keep
them happy by turning out your final product quickly!
So now that we have covered our french fries, we can move
onto our fish.
BEER BATTER FRIED FISH
BEER BATTER FRIED FISH
1.
Thoroughly rinse and dry each filet.
Cut into smaller diamond shaped pieces.
This makes it easier to batter and quicker to fry.
2.
Set up the frying station. Take
about 1 cup of flour and put it in a bowl.
In another medium mixing bowl, pour in the bottle of beer, and sift the
remaining flour (1.5 cups) and garlic powder into the beer while whisking until
evenly combined without over-mixing. Over mixing will make the batter gummy, and nobody wants chewy fried
fish. Taste batter and season with salt
and pepper to perfection.


3. Once oil has reached 375 degrees you can begin frying. First drop each piece of fish into the batter, then dredge through the flour to coat. Finally, gently place into hot lard. Fry for about 2-3 minutes, flip, and repeat until golden brown and yummy. Work in small batches of 3-5 pieces of fish, depending on the size of your frying pan, and remember to manage your temperature as mentioned before! Move them around a bit so that they don’t stick together.


4.
Remove to a cooling rack for about a minute to relax and release any
extra oil. Serve with a lemon wedge and
tartar sauce (that’s an entry for another day.)


Following these procedures I was able to alternate between a
batch of fish and a batch of fries, keeping the guests smiling, and I was even
able to leave my sword in the closet! We
weren’t even able to get a photo of everything plated up; people were too busy
stuffing their faces! The fries were
soft and tender on the inside, crisp and golden on the outside, and after a
splash of malt vinegar had a flavor and freshness rivaling a gourmet
restaurant. The fish had a wonderful
crunch on the outside, but was fluffy and light due to the carbonation in the
beer, and the flaky white cod was moist and flavorful. Served
alongside my Mom’s homemade Macaroni & Cheese and some homemade tartar
sauce and a quick spritz of lemon this became a real home run with the crowd.
And there we have it!
The first real entry of what hopes to be an outstanding collection here
at Hands-On Cuisine. The wonderful thing
about this dinner was how simple and fun it was to throw together. As for lard as a valuable tool in the
kitchen? The jury is back, and they
loved it. I do not frequently fry food
at home, so when I do I want to go all out. (There’s a Dos Equis joke in there somewhere.) Even though the lard cost almost as much as a
big jug of canola oil it really brought a flavor to the food that veggie oil lacks.
Some housekeeping: I
hope to make a condensed version of both of these recipes available so that if you
choose to try them yourself you can have a simpler edition to print off to have
with you. Also, follow me on Twitter
@HandsOnCuisine, or on Facebook at www.facebook.com/HandsOnCuisine to get all most recent updates and spread the good word! And as always, any input is greatly appreciated!!
Xometry provides a greatest guess based mostly on the geometry of your item, and the pricing updates when you slender down your materials or process options. They give you direct entry to addContent information, obtain free on-line Direct CNC quotations, design verification, and your whole 3D printed prototype design information and order historical past 24 hours a day, 7 days per week. 3D Systems on Demand has modern manufacturing amenities all over the the} world, as well as|in addition to} native assist from our staff of utility engineers who have intensive industry and manufacturing information.
ReplyDelete